By [Meg M.] | Posted on March 24, 2026 Disclosure: This post contains affiliate links. I may earn a small commission at no cost to you.
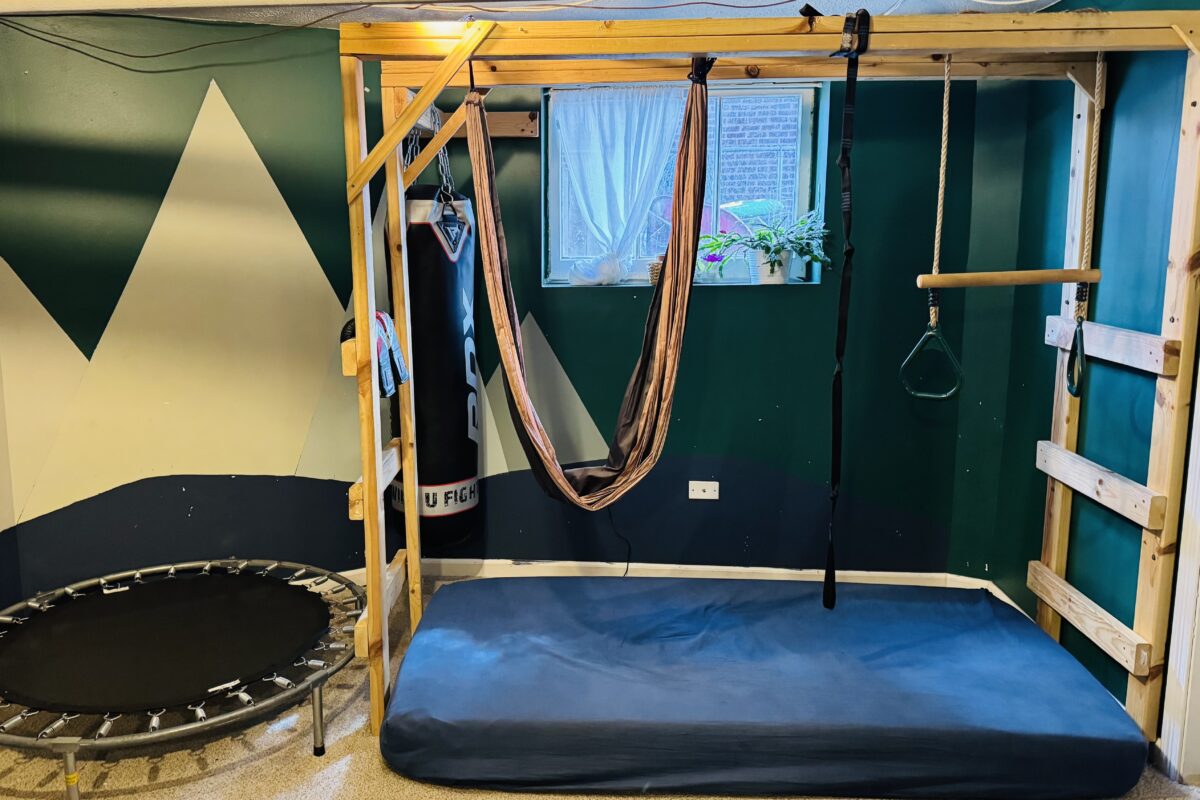
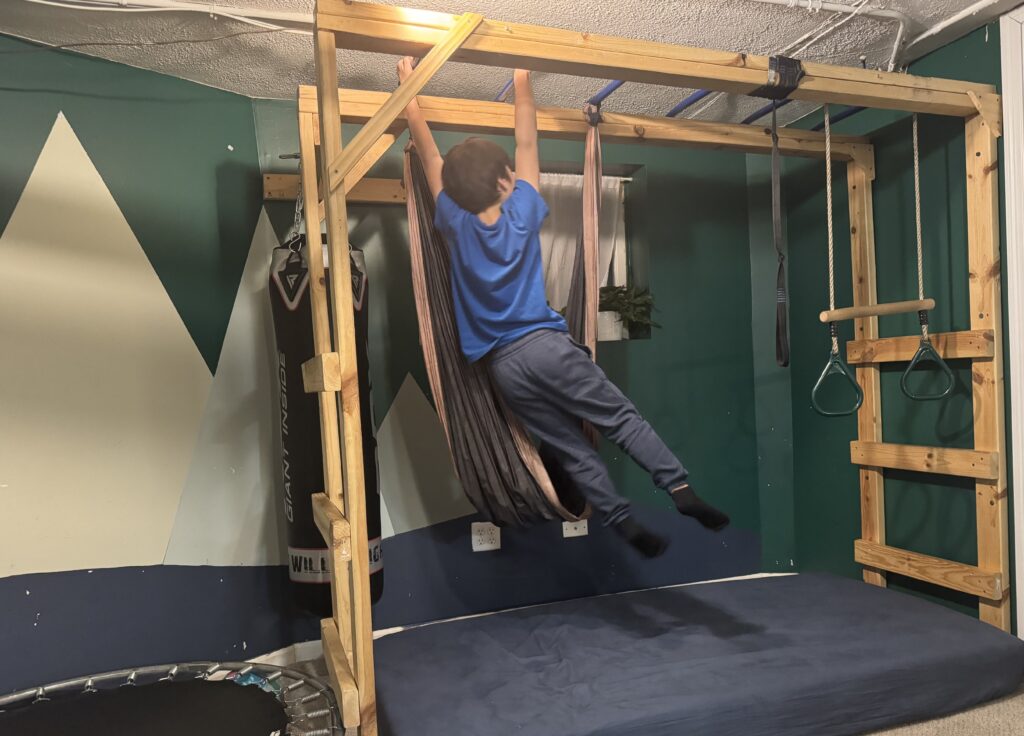
Seven years ago, I built this indoor gym for my four kids just before the world shut down. It has survived dozens of playdates, thousands of swings, and is still the first place friends go when they visit. If you have a small basement or low ceilings (ours is only 6’10”), this is the perfect way to burn off energy indoors. Details below!
Project Overview
| Specs | Details |
| Footprint | (Ours is 7ft 4in x 4ft) add extra if using trampoline |
| Budget | $150–$300 depending on equipment |
| Skill Level | Beginner DIY (Uses basic tools like a drill and saw) |
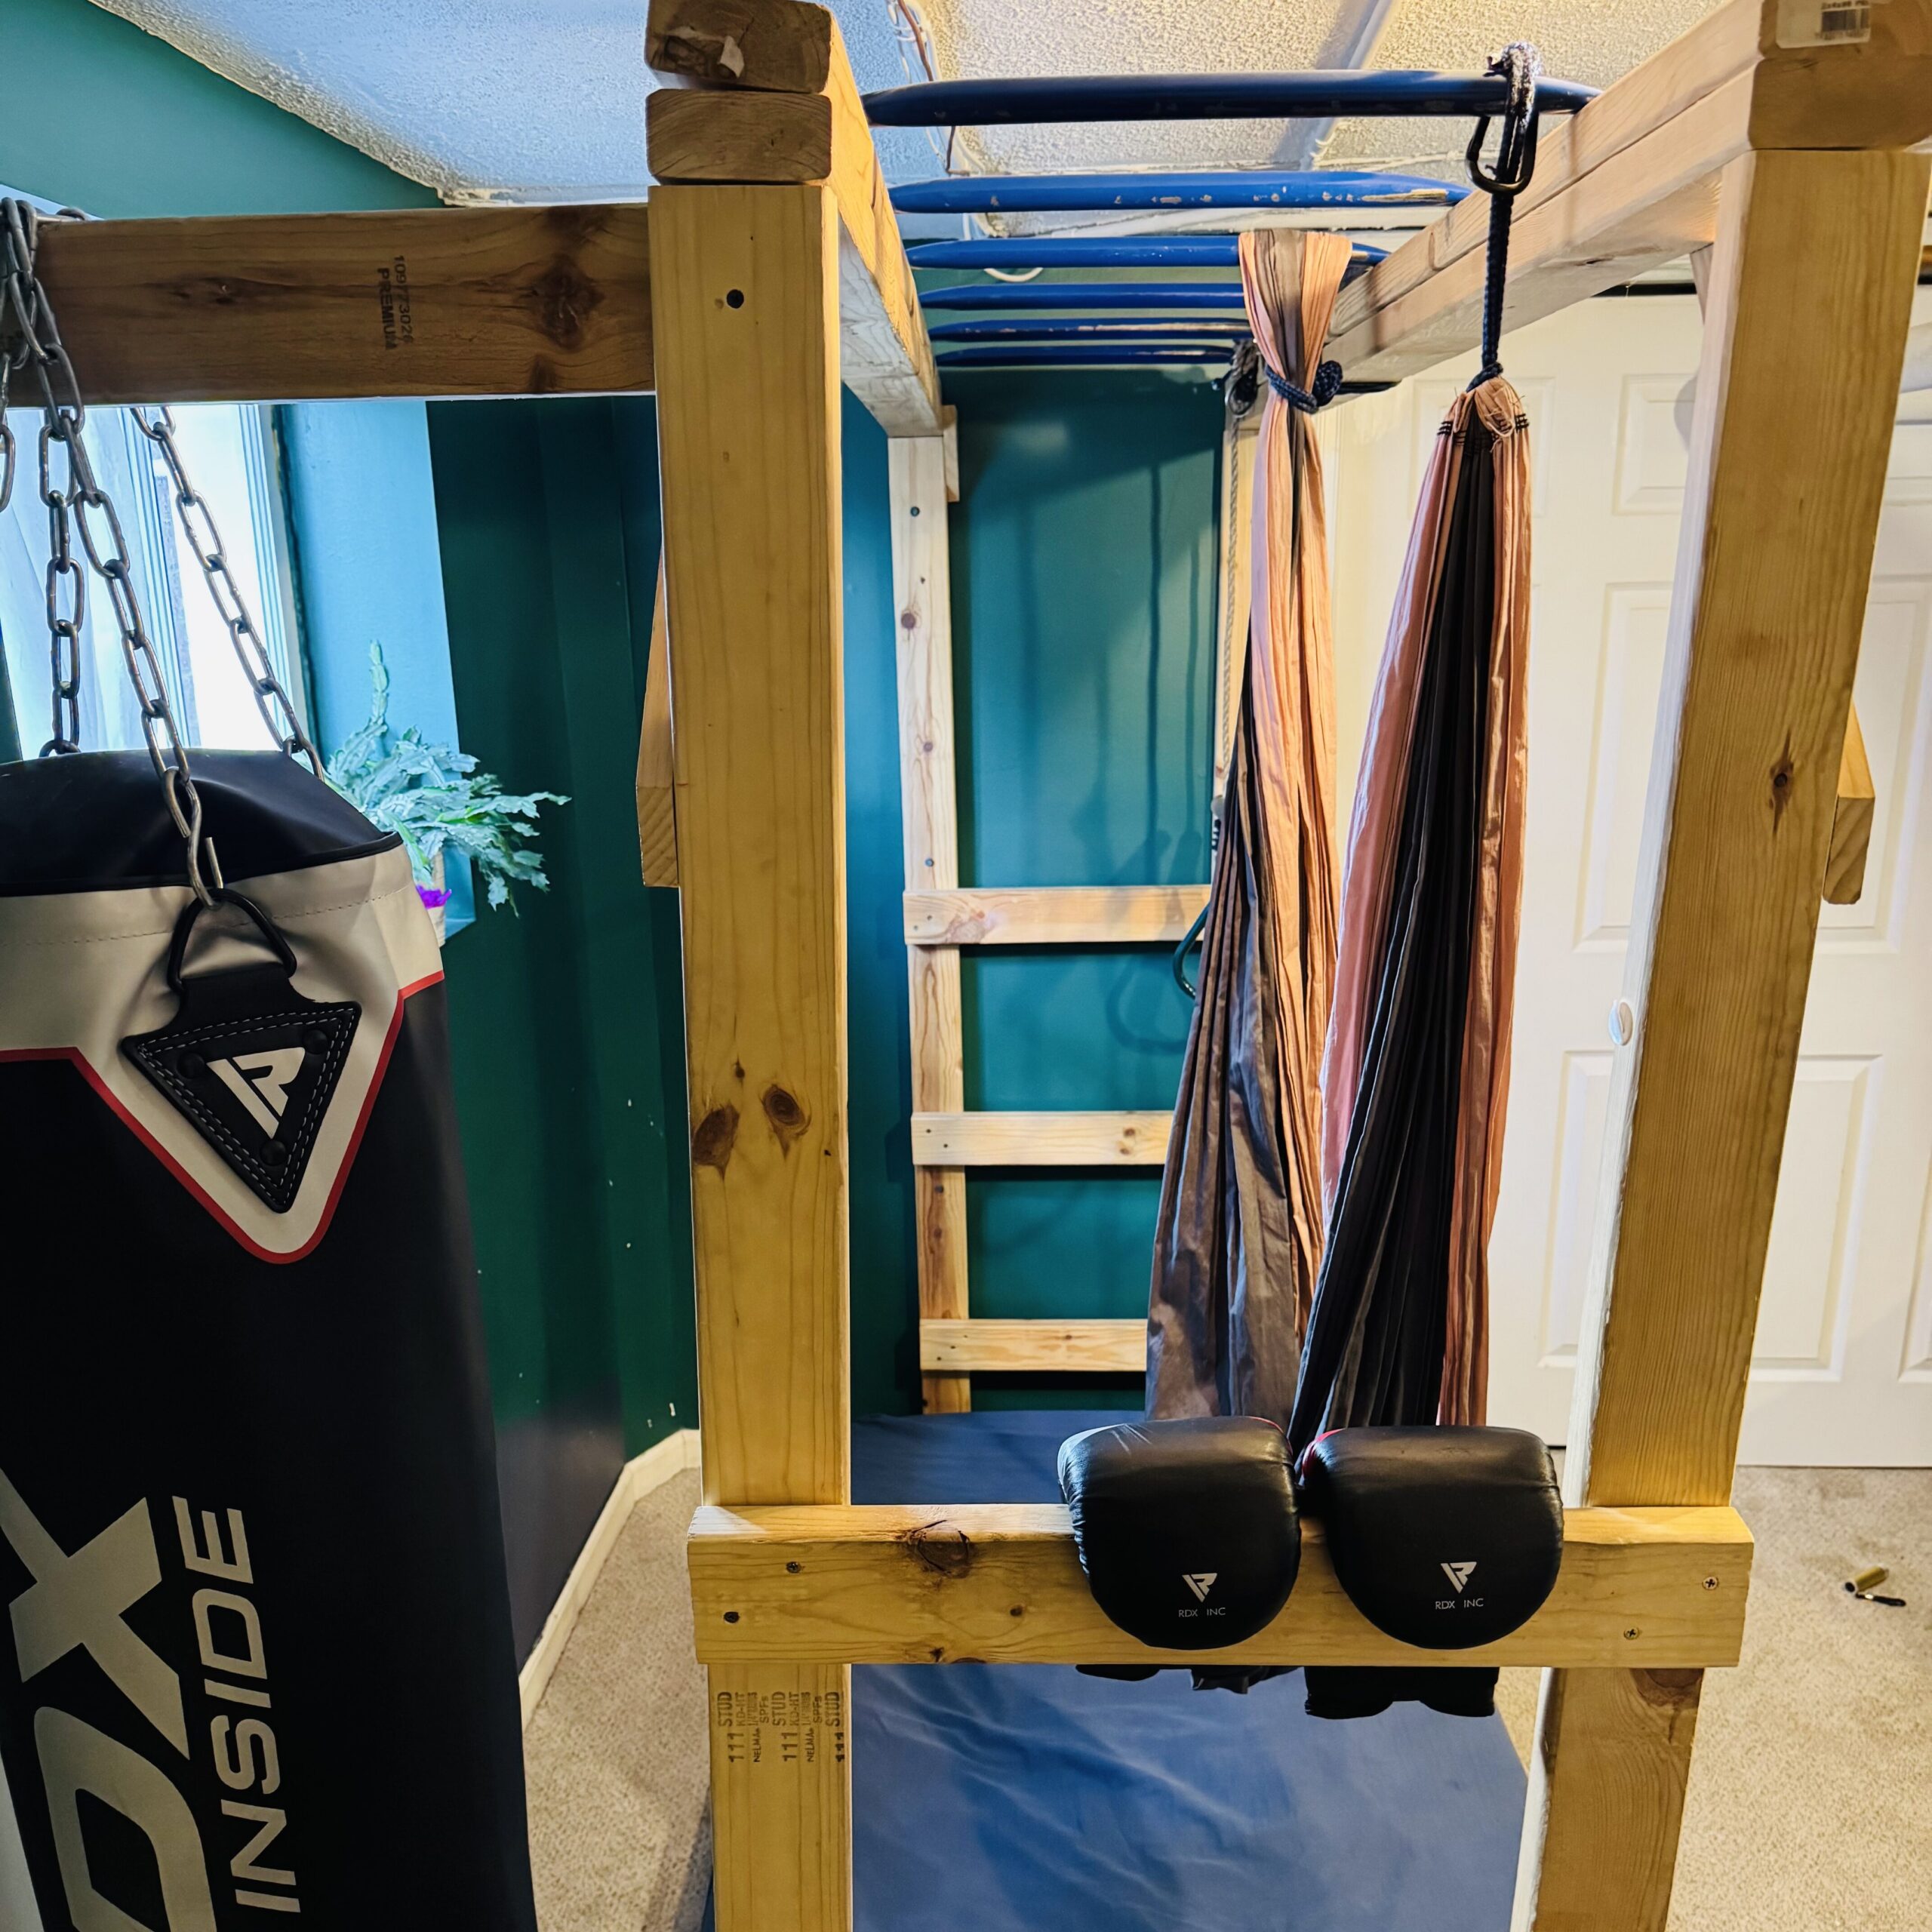
| Supports | Monkey bars, sensory swings, punching bags, and rings |
Ready to Build? Get the Step-by-Step Plans!
I’ve had parents asking for the exact plans ever since I made this gym. So finally I put together a complete 10-page Digital Build Guide includes: * The Exact Cut List: 2×4 lumber lengths so you don’t waste wood. * 3D Diagrams: Clear visuals of the height, width, and depth. * Assembly Guide: Step-by-step instructions for wall-mounting.
👉Grab the Full Build Plans here→ : https://www.etsy.com/listing/4473182129/diy-indoor-ninja-gym-plans-kids-obstacle
Materials & Shop the Gym (Affiliate Links)
To build the frame, you’ll need 10 Pine boards (2×4×8′) and a handful of 1×4 boards for bracing. Here are the specific accessories we used to make our ‘Ninja’ course
- Heavy Duty Hardware: https://amzn.to/4lOHkSp
- 3″ construction screws and Lag bolts: https://amzn.to/4d3Il6R
- Carabiners: https://amzn.to/4c3UA2c
- Monkey Bars: Metal or wood cross bars: https://amzn.to/4dHbzZp
- Safety First: A thick crash mat or twin mattress is a must: https://amzn.to/47nkVFQ
- Sensory Fun: https://amzn.to/47nkD1ISensory hammock
- Ninja gym rings: https://amzn.to/3NZaba7
🔨 The Build Process (Simplified)
The structure is built around two sturdy side frames that bolt directly into your wall studs — no wobbling, no guessing. Here’s a quick look at how it comes together:
Cut your 2×4s to length and assemble two identical frames flat on the floor before standing them up.
Space the frames 2.5 feet apart and anchor them to your wall studs for maximum stability.
Drop in the metal cross bars spaced 10–12 inches apart — perfect kid-sized reach.
Attach the step rungs to the vertical posts starting 6 inches off the ground.
Hang your sensory swing, punching bag, or gym rings using heavy-duty eye bolts. Lay a crash mat underneath and you’re done!
Want the exact measurements, cut list & 3D diagrams?
The Full 10-Page Build Guide Has Everything 📐
- ✅ Exact cut list — no wasted wood
- ✅ 3D diagrams for every step
- ✅ Wall-mount & freestanding options
- ✅ Fits ceilings as low as 6’10”
🛒 Get the Full Build Guide on Etsy →
Bonus: The Ninja Training Challenge
Once it’s built, try this 3-round challenge with your kids:
- 10 Monkey Bar Swings
- 30 Second Hang
- 10 Punches on the Bag
Safety Disclaimer:
Important: This structure is for home recreational use only. Always supervise children and ensure you are using appropriate safety padding like a crash mat. Regularly check hardware to ensure everything remains secure.