If you’ve been wanting to start a garden but don’t know where to begin, DIY raised garden beds are one of the easiest ways to get started.
They’re simple to build, look clean and organized, and make gardening way more manageable—especially for beginners. I built these exact beds 8 years ago and they are still going strong.
What You’ll Need
Use what you have on hand or buy at your local hardware store. For my project I used old fencing.
Basic materials:
- Wood (cedar or pressure-treated lumber) 4×4 posts; 1×4 Cedar fencing boards
- Screws or nails and metal tap screws
- Drill
- Saw (or ask hardware store to cut wood to desired length)
- Sheet metal and metal Snips
- Optional: chicken wire
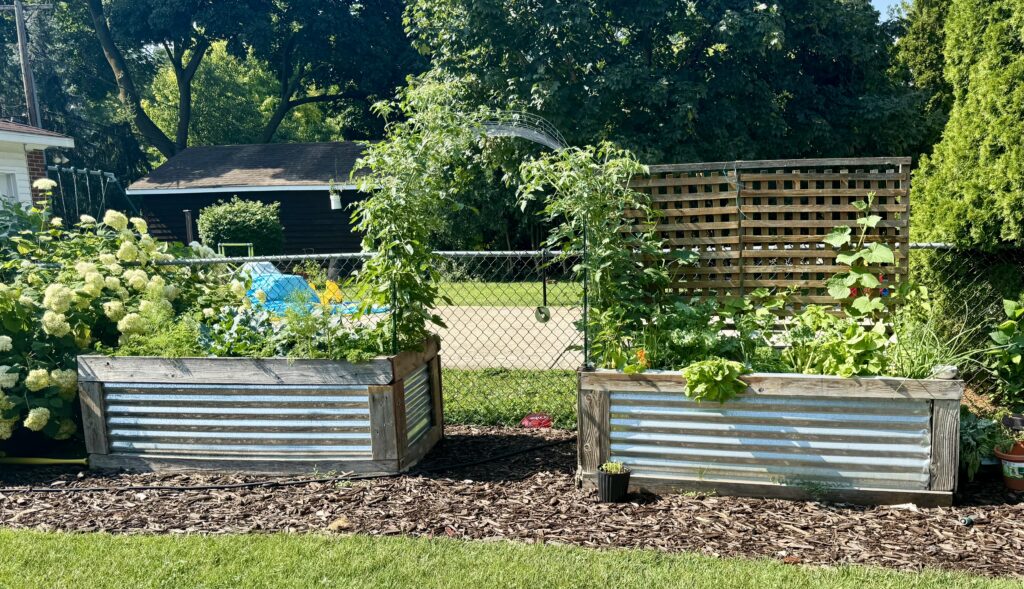
Simple DIY Raised Bed Setup
You can build a basic raised bed in under a few hours.
Step 1: Choose Your Location
Pick a spot that gets at least 6–8 hours of sunlight per day. Look outside in morning, afternoon and early evening to be sure to find the right spot.
Ideally have a water source nearby
Step 2: Build Your Frame
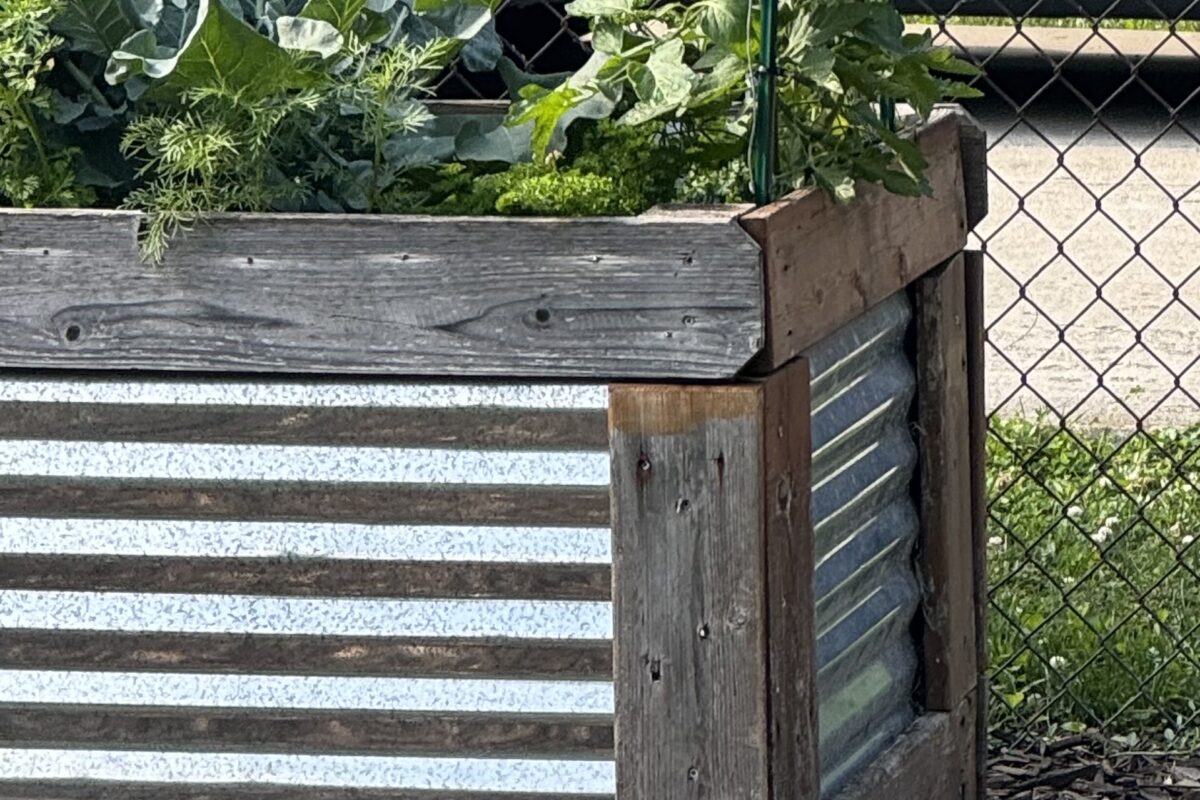
A simple rectangle works best for beginners. Build the long sides first then the short sides. Lay 1×4 cedar boards in rectangle; Lay sheet metal on top of cedar boards cut exactly to size of rectangle; tap screw sheet metal to 1×4 cedar boards. Do this for each side. Now you have the sides complete. Next saw four 3ft sections of 4×4 posts.
- Common size: 3 ft x 6ft
- Height: 36 inches
Step 3: Prepare the Ground
- Remove grass if needed and level ground
- Lay landscape fabric optional
Step 4: Assemble the bed
- Place 4×4 posts in rectangle over prepared ground; pound them in with a mallet or arm power.
- Start with long sides: Use deck screws to secure assembled sides to 4×4 posts
- optional: add a layer of chicken wire to bottom of bed to prevent critters from eating your plants from below.
Step 5: Fill the beds
- DO NOT use soil to fill the whole bed; it’s too deep. Fill bed with yard scraps, cardboard, sticks, leaves; stomp it down as you go.
- Once over half the bed is full you can add your soil.
- I recommend a mix of soil, sand and a 2 inch top layer of compost
- Every year I add a bit more of this mixture because the ground always settles a bit
NOW ENJOY PLANTING YOUR FAVORITE VEGGIES, HERBS, or FLOWERS; HAPPY PLANTING!!!!
Budget Tips (Save Money)
You don’t have to spend a lot to get started:
- Use basic lumber; look around your neighborhood someone’s fence is always falling
- Start with one bed, not several
- Look for discounted soil or compost locally
Final Thoughts
Building DIY raised garden beds is one of the easiest and most rewarding home projects you can do.
It’s beginner-friendly, budget-friendly, and a great way to grow your own food right at home.
Tools & Supplies to Get Started
If you’re starting from scratch, these basics will help:
- Drill and screws https://amzn.to/3Pw0wbv
- https://amzn.to/4c4suUu
- Metal Snips: https://amzn.to/4bO3ZcX
- Lumber (cedar or treated wood)
These simple tools make the whole process faster and easier—especially for beginners.
They’re simple to build, look clean and organized, and make gardening way more manageable—especially for beginners.