By Meg | BuildsandBlooms
If you have a west-facing deck, you already know the struggle. By mid-afternoon, it turns into an actual oven. We’re talking “forgot your sunscreen and deeply regret it” levels of sun. For years, our back deck was basically unusable from about 2pm until sunset — which, ironically, is exactly when you actually want to be outside.
So we tried everything.
The tried and failed:
Umbrellas. We went through more patio umbrellas than I care to admit. Wind would catch them, flip them inside out, and send them sailing across the yard like a very colorful, very expensive kite. RIP to every single one of them.
Pop-up canopy tents. Same story. We’d got one set up, felt very proud of ourselves, and then a good Midwest gust would remind us exactly who’s in charge around here. One particularly memorable afternoon, our canopy became a temporary neighbor’s problem. Sorry, Gerald!
We live in an area with genuinely high winds, and nothing we anchored to the deck itself could handle it. Everything felt flimsy, temporary, and honestly just annoying to deal with every single time we wanted to sit outside.
We weren’t ready to build a full pergola — the cost, the commitment, the permits — so we kept suffering through another summer of baking on the deck like a very uncomfortable casserole.
Enter: The Shade Sail : https://amzn.to/4m1fQsT
I’ll be honest, I’d seen shade sails before and always assumed they were for fancy resort pools or people with perfectly landscaped backyards. Not for our very normal suburban deck with a grill and some mismatched chairs.
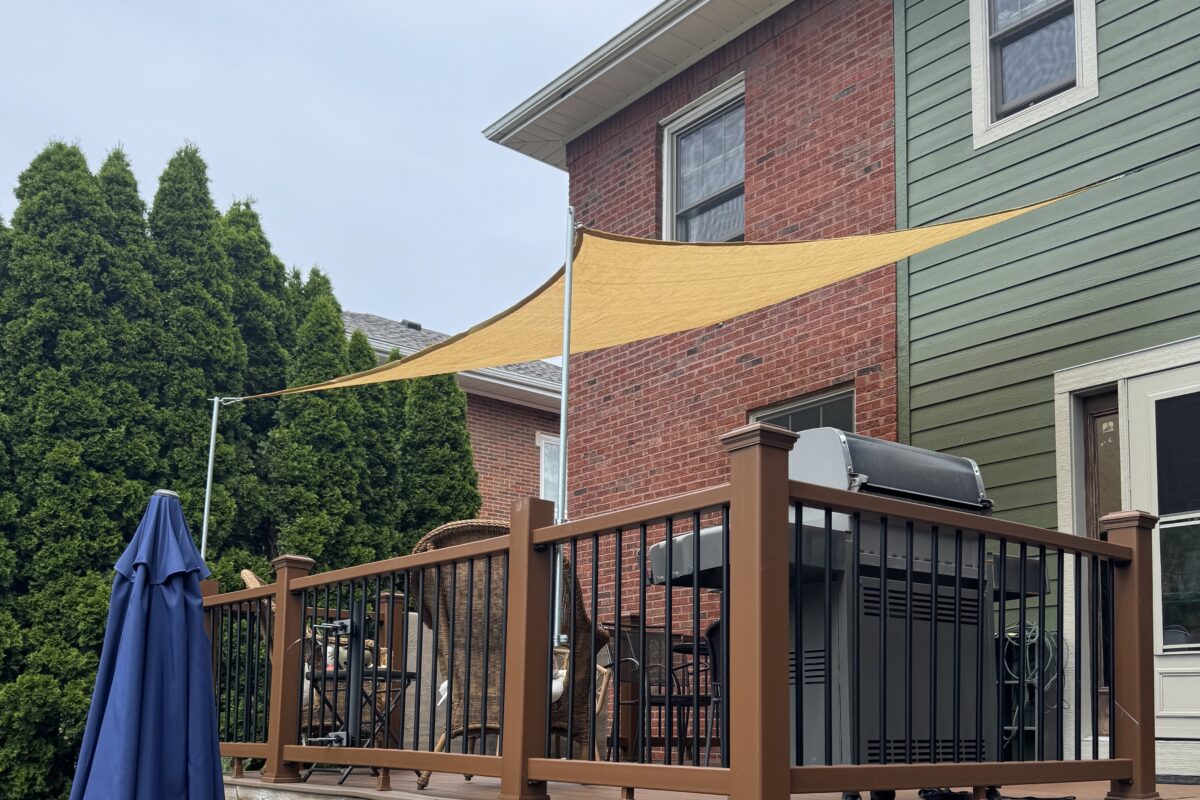
But I kept coming back to them. They’re tensioned at the corners — meaning the wind has nothing to catch, nowhere to flip, nothing to destroy. No poles sticking up through the middle. No zipper to fight with. Just a taut sail stretched across your space doing exactly what it’s supposed to do.
So we went for it.
What Made Ours Work
The trickiest part of hanging a shade sail isn’t the sail itself — it’s figuring out the anchor points. We had a house wall on two sides, which was great for attachment, but the other two corners had nothing. That meant freestanding posts.
We ended up using a combination of:
- Eye bolts into wall studs on the house side: https://amzn.to/41EKFtP
- Post Extenders using 2″ conduit on the open deck corners
- Carabiners: https://amzn.to/41EKKxD
And here’s a tip nobody tells you — your posts need to be taller than you think. The sail needs to be angled slightly so rain runs off instead of pooling in the middle (learned that one the fun way). If your existing posts are just a little too short, you can extend them using 2″ steel conduit + U brackets https://amzn.to/4uZlFep instead of replacing the whole post. Game changer.
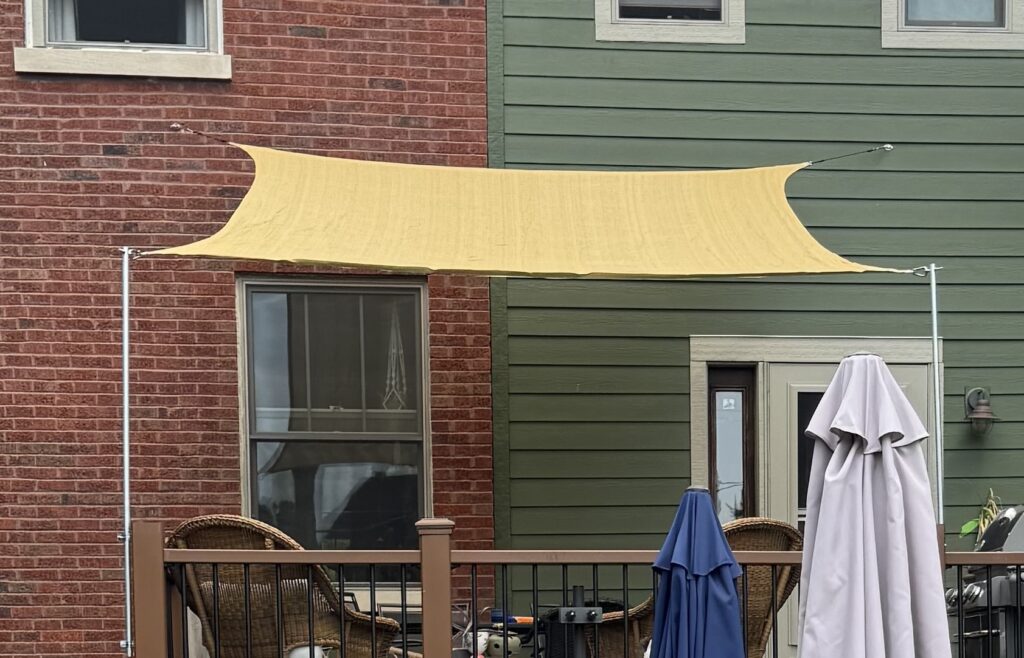
The other thing that makes or breaks a shade sail is tensioning. You need turnbuckles at each corner, and you tighten them in a diagonal pattern — not in order around the sail. Do it right and the sail is drum-tight and gorgeous. Do it wrong and it sags in the middle like a sad hammock.
The Result?
Our deck went from unusable oven to our favorite spot in summer. We eat out there, the kids hang out there, we have people over — all things that were basically impossible before 7pm on a summer evening.
The sail handles our Midwest winds without even flinching. We’ve had it through multiple storm seasons now and the only maintenance is loosening the turnbuckles slightly in fall and taking the sail down before winter.
Total cost was somewhere in the $100–225 range depending on whether you need posts — which, compared to a pergola, is basically nothing.
Want the Full Step-by-Step?
Because I got SO many questions about this on Pinterest, I put together a complete DIY Shade Sail Installation Guide— with everything from measuring your space and sizing your sail, to installing anchor points, tensioning, troubleshooting, and seasonal maintenance.
It’s based on our actual install, with real photos from our deck (the one that used to bake us alive 😄).
👉 Grab the Install Guide + Planning Worksheet on Etsy → https://www.etsy.com/listing/4479412109/shade-sail-install-guide-planning
The planning worksheet alone will save you from buying the wrong size sail — which is the #1 mistake people make.
Quick Tips Before You Start
- Size down — your sail should be 1–2 ft smaller than your space on each side for proper tensioning
- Always hit a stud — never attach eye bolts to siding alone
- Angle one corner or side higher — so rain runs off instead of pooling
- Use stainless steel hardware — regular hardware will rust outdoors within one season
- Take it down before winter — store it dry and it’ll last for years